
So, you're thinking about growing plants from seeds indoors? That's awesome! It's a really cool way to get a head start on your garden, even when it's cold outside. You get to watch tiny seeds turn into strong plants right in your home. This guide will walk you through everything, from picking out the best seeds to making sure your little plants get all the light and water they need. It's not as hard as it sounds, and it's super rewarding.
Key Takeaways
- Pick seeds that are good for starting inside, like tomatoes or herbs.
- Get yourself some good seed-starting mix and containers that drain well.
- Make sure your seedlings get plenty of light, either from a sunny window or a grow light.
- Keep the temperature and humidity just right for your young plants.
- Slowly get your plants used to being outside before you move them to the garden.
Choosing the Right Seeds for Your Indoor Garden
So, you're thinking about starting seeds indoors? Awesome! It's a super rewarding way to get a jump start on the growing season and have more control over your garden. But before you get too excited and start throwing seeds into any old dirt, let's talk about picking the right seeds for your indoor setup. It's not as hard as it sounds, I promise!
Understanding Seed Packets
Seed packets are like little treasure maps! They tell you everything you need to know about your seeds, from when to plant them to how much sun they need. Seriously, don't skip reading them! Look for key info like:
- Germination rate: This tells you what percentage of seeds are likely to sprout. Higher is better!
- Days to maturity: This gives you an idea of how long it will take for your plants to be ready to harvest.
- Sunlight requirements: Make sure you choose seeds that will thrive with the amount of light you can provide indoors.
Best Plants to Start Indoors
Not all plants are created equal when it comes to indoor seed starting. Some are just easier and more rewarding than others. Here are a few of my favorites:
- Tomatoes: These guys love the warmth and can be started indoors weeks before the last frost.
- Peppers: Similar to tomatoes, peppers need a long growing season, so starting them indoors is a great idea.
- Herbs: Basil, parsley, and oregano are all easy to start indoors and will add fresh flavor to your cooking.
- Lettuce: A fast growing plant that doesn't need a lot of light.
Where to Buy Quality Seeds
Where you get your seeds matters! You want to make sure you're buying from a reputable source that sells fresh, viable seeds. Here are a few options:
- Local nurseries: These are great because you can often get advice from experienced gardeners.
- Garden centers: Big box stores often carry seeds, but the quality can vary.
- Online seed companies: There are tons of online retailers that specialize in seeds. Look for companies with good reviews and a wide selection.
Buying quality seeds is an investment in your garden's success. Don't skimp on this step!
Avoiding Common Seed Selection Mistakes
Even experienced gardeners make mistakes when choosing seeds. Here are a few common pitfalls to avoid:
- Starting too early: It's tempting to get a head start, but if your seedlings outgrow their space before it's time to transplant them, you'll have problems.
- Choosing plants that are too big: If you have limited space, don't try to grow giant pumpkins indoors!
- Ignoring your climate: Make sure you choose plants that are suited to your growing zone.
Setting Up Your Indoor Growing Space
Alright, let's get your indoor growing space ready to rock! This is where the magic happens, where tiny seeds transform into vibrant plants. It's not as complicated as it sounds, I promise. With a little planning, you'll have a setup that's perfect for nurturing your seedlings.
Essential Supplies for Seed Starting
Okay, first things first, you gotta gather your gear. Think of it like prepping for a fun science experiment, but with plants! Having the right stuff makes a huge difference. Here's what you'll need:
- Seed Trays or Containers: You can use anything from fancy seed trays to recycled yogurt cups. Just make sure they have drainage holes! Nobody likes soggy roots.
- Seed Starting Mix: This is super important. Don't use regular garden soil; it's too heavy. Get a seed-starting mix that's light and fluffy. It helps prevent diseases too.
- Grow Lights: Unless you have a super sunny window, you'll probably need grow lights. They give your seedlings the light they need to grow strong and not get all leggy.
- Heat Mat (Optional): These are great if your house is chilly. They help keep the soil warm, which speeds up germination. My cat loves to sleep on mine!
- Spray Bottle: For gentle watering. You don't want to blast your tiny seedlings with a hose!
- Labels: Trust me, you'll forget what you planted where. Label everything!
Selecting Containers and Trays
Choosing the right containers is like picking out a comfy bed for your little plant babies. You want something that's just the right size and shape. Here are a few things to keep in mind:
- Size Matters: For most seeds, individual cells or small pots work great. If you're starting something that gets big quickly, like tomatoes, go for something a bit larger.
- Drainage is Key: I can't stress this enough. Make sure your containers have drainage holes. Otherwise, your seedlings will drown.
- Recycle and Reuse: Get creative! You can use old yogurt cups, plastic containers, whatever you have lying around. Just clean them out first.
- Consider Peat Pots: These are cool because you can plant the whole pot directly into the ground when it's time to transplant. No root disturbance!
Preparing the Seed-Starting Mix
Your seed-starting mix is like the foundation of your whole operation. You want to make sure it's just right. Here's how to get it ready:
- Moisten it First: Before you put the mix in your containers, wet it down. You want it to be damp, but not soaking wet. Like a wrung-out sponge.
- Don't Pack it Down: Gently fill your containers with the moistened mix. Don't pack it down too hard, or it will be difficult for the roots to grow.
- Use a Sterile Mix: This helps prevent diseases that can kill your seedlings. You can buy a pre-made sterile mix, or you can sterilize your own by baking it in the oven.
Setting up your indoor growing space doesn't have to be expensive or complicated. The most important thing is to create a warm, well-lit environment where your seedlings can thrive. With a little bit of effort, you'll be well on your way to a bountiful harvest!
Providing the Perfect Environment for Your Seedlings
Alright, you've got your seeds, your soil, and your containers all set. Now comes the really important part: making sure your little seedlings have the perfect environment to thrive! Think of it like setting up a cozy nursery for your green babies. It's all about light, temperature, and water – get these right, and you'll be amazed at how well your plants grow.
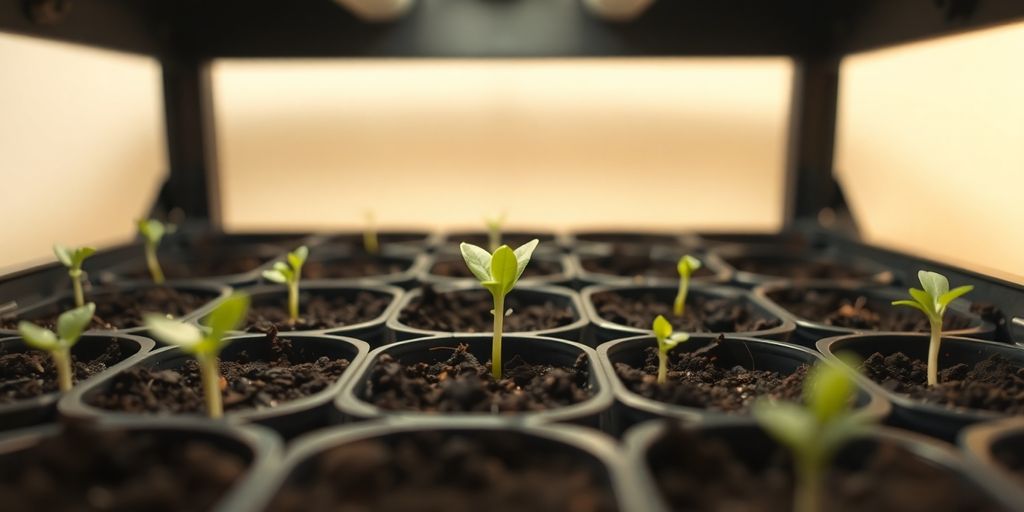
Lighting Solutions for Indoor Seedlings
Let's talk about light. Seedlings need a lot of it, and unless you have a super sunny windowsill, you'll probably need to invest in some grow lights. Don't worry, they don't have to be expensive!
Here's the deal with lighting:
- Full-spectrum LED lights are your best bet. They mimic natural sunlight and are energy-efficient. Look for lights around 5000K Kelvin or higher.
- Keep the lights close to your seedlings – just a few inches above them. This prevents them from getting leggy and weak.
- Use a timer to ensure your seedlings get about 12-16 hours of light each day. Plants need their rest too!
Maintaining Ideal Temperature and Humidity
Temperature and humidity are also key. Most seeds germinate best in warm conditions, around 70-75°F (21-24°C). A heat mat can be a lifesaver, especially if your house is on the cooler side. Once the seedlings sprout, you can lower the temperature a bit, but keep it consistent.
Here's how to manage temperature and humidity:
- Use a heat mat to warm the soil for germination. Once they sprout, you can remove the heat mat.
- A humidity dome or plastic wrap can help retain moisture, especially in dry environments. Just make sure to vent it regularly to prevent mold growth.
- A small fan can help circulate air and prevent fungal diseases. Plus, it strengthens the stems of your seedlings!
Watering Your Young Plants Just Right
Watering is another crucial aspect. Overwatering can lead to root rot, while underwatering can cause your seedlings to dry out. The key is to find the right balance.
Here are some watering tips:
- Use a spray bottle or watering can with a gentle spray to avoid disturbing the seedlings.
- Water when the top of the soil feels dry to the touch. Don't let it dry out completely, but don't keep it soggy either.
- Water in the morning so the foliage has time to dry before nightfall. This helps prevent fungal diseases.
Creating the perfect environment for your seedlings might seem like a lot of work, but it's totally worth it. By providing the right light, temperature, and moisture, you're setting your plants up for success and ensuring a bountiful harvest later on. So, take your time, pay attention to your seedlings' needs, and enjoy the process!
Nurturing Your Seedlings to Strong Plants
Okay, you've got sprouts! Now comes the fun part: turning those tiny seedlings into robust plants ready for the garden. It's like raising kids, but with more dirt and less drama (hopefully!).
Thinning for Healthier Growth
Thinning seedlings is a tough love kind of thing. It feels mean to snip away perfectly good plants, but trust me, it's for the best. Think of it as giving the strongest seedlings a chance to shine.
- Once your seedlings have their first true leaves (not the initial seed leaves), it's time to thin.
- Snip off the weaker seedlings at the soil line with small scissors. Don't pull them out, or you risk disturbing the roots of the ones you want to keep.
- Aim to leave the strongest seedling in each cell or pot. Give them enough space to grow without crowding each other.
Feeding Your Growing Seedlings
Just like us, seedlings need food to grow big and strong. But be careful not to overdo it – they're delicate little things.
- Start feeding your seedlings when they have their first true leaves.
- Use a liquid fertilizer diluted to half strength. A balanced fertilizer is a good choice. Fish emulsion or seaweed extract are also great organic options.
- Fertilize every 1-2 weeks. Watch your plants closely. If they look pale or stunted, they might need more food. If they look dark green and leggy, you're probably over-fertilizing.
Troubleshooting Common Seedling Issues
Even with the best care, seedlings can sometimes run into problems. Here are a few common issues and how to fix them:
- Leggy seedlings: This means they're not getting enough light. Move them closer to your grow lights or a sunnier window. You can also try gently brushing them with your hand a few times a day to encourage stronger stems.
- Damping off: This is a fungal disease that causes seedlings to rot at the soil line. Make sure your seed-starting mix is well-draining and avoid overwatering. Improve air circulation by using a small fan. If you see damping off, remove the affected seedlings immediately to prevent it from spreading.
- Yellowing leaves: This can be a sign of nutrient deficiency or overwatering. Check your watering habits and consider fertilizing with a balanced fertilizer.
Remember, every seedling is different, and it takes time to learn what works best for your plants and your growing conditions. Don't be afraid to experiment and adjust your care as needed. And most importantly, don't give up! Even if you lose a few seedlings along the way, you'll learn something valuable from the experience. Before you know it, you'll be enjoying the fruits (or vegetables, or flowers) of your labor. To prepare for the next stage, learn about hardening off vegetable seedlings.
Getting Your Plants Ready for the Great Outdoors
The Art of Hardening Off
Okay, so you've babied your seedlings indoors, and they're looking all cute and green. Now it's time for the tough love! "Hardening off" is basically toughening them up for the real world. This process gradually acclimates your indoor-grown plants to outdoor conditions, reducing transplant shock. Think of it like sending your kid to summer camp – they need to adjust to the wild!
Here's how I usually do it:
- Start by placing your seedlings in a sheltered spot outside for just an hour or two. A shady porch or patio works great.
- Each day, increase the amount of time they spend outdoors, and gradually introduce them to more sunlight. Don't shock them with full sun right away!
- Keep an eye on the weather. If it's super windy or there's a sudden cold snap, bring them back inside. Better safe than sorry!
Hardening off is not optional. Skipping this step is like sending a baby into a blizzard. Your plants will get sunburned, wind-whipped, and generally traumatized. Take the time, your plants will thank you.
Knowing When to Transplant
Timing is everything! You don't want to rush your little guys out too early, but you also don't want them to get root-bound in their containers. So, how do you know when it's time to transplant?
- Check the weather forecast. Make sure there's no danger of frost. Seriously, no frost!
- Look at your plants. Are they starting to outgrow their containers? Are their roots circling around the bottom? These are good signs they're ready for a bigger space.
- Consider the plant type. Some plants, like tomatoes, are pretty forgiving. Others, like squash, are more sensitive to transplanting.
Smooth Transitions for Happy Plants
Transplanting can be a bit stressful for plants, so it's important to make the transition as smooth as possible. Here are a few tips:
- Choose a cloudy day or transplant in the late afternoon to avoid scorching the plants.
- Dig a hole that's big enough to accommodate the root ball. Gently loosen the roots before planting.
- Water thoroughly after transplanting. This helps settle the soil and reduces transplant shock.
- Add some compost or fertilizer to the planting hole to give your plants a boost. They'll appreciate the extra nutrients!
Why Growing Plants from Seeds Indoors is a Game-Changer
Get a Head Start on the Growing Season
Starting seeds indoors is like hitting the fast-forward button on spring! Some plants, like tomatoes and peppers, take ages to mature. By getting them going inside, you're giving them a major head start while the weather outside is still doing its winter thing. This means you could be enjoying fresh veggies weeks earlier than your neighbors! It's all about being prepared and getting a jump on things.
Discover Unique Plant Varieties
Tired of the same old options at the local garden center? Starting seeds indoors opens up a whole new world of possibilities. You can find rare heirloom varieties, unique colors, and plants you've never even heard of before. It's like having a secret garden filled with all sorts of amazing things. Plus, you get to experiment and try new things without being limited by what's available locally. It's a plant lover's dream!
Save Money and Grow More
Let's be real, buying starter plants can get expensive. A packet of seeds, on the other hand, is super cheap and contains a ton of potential plants. Think of all the extra veggies, herbs, or flowers you can grow for the same price! It's a budget-friendly way to fill your garden and your plate. Plus, you can use those savings for other fun gardening stuff, like fancy tools or cool containers. It's a win-win!
Indoor seed starting gives you so much control, saves you money, and lets you grow all sorts of cool plants. It's a small investment that pays off big time when your garden is bursting with life.
Making Your Indoor Seed Starting Journey Fun and Easy
Tips for Beginner Gardeners
Okay, so you're new to this whole seed-starting thing? No sweat! It's way easier than it looks. First off, don't try to do too much at once. Start with just a few types of plants that are known to be easy, like herbs or tomatoes. Read the seed packets carefully – they're like little instruction manuals. And don't be afraid to mess up! Everyone does, and that's how you learn.
Here are a few things to keep in mind:
- Start small: A few seed trays are way less overwhelming than a whole greenhouse.
- Use the right soil: Seed-starting mix is your friend. Regular potting soil can be too heavy. You can buy a [quality soil mix](#e3c9] or make your own.
- Don't overwater: Soggy soil is a seedling's worst nightmare.
Remember, gardening should be fun! If you're stressing out, take a step back and remember why you wanted to grow plants in the first place. It's all about enjoying the process.
Learning from Every Sprout
Not every seed is going to make it, and that's totally okay. Think of each little sprout (or lack thereof) as a learning opportunity. Did your seeds not germinate? Maybe the soil was too dry, or too cold. Did your seedlings get leggy? They probably needed more light. Keep a little notebook and jot down what you did, what happened, and what you might try differently next time. Experimentation is key!
Here's what I've learned over the years:
- Lighting is crucial: If you don't have enough natural light, invest in some grow lights.
- Don't be afraid to ask for help: Local gardening groups or online forums are great resources.
- Keep an eye on the temperature: Most seeds like it warm to germinate. A heat mat can be a game-changer.
Celebrating Your Green Thumb Success
Okay, so you've got some seedlings growing – awesome! Now's the time to pat yourself on the back. Seriously, you did it! Don't wait until harvest time to celebrate. Enjoy the little victories along the way, like the first time you see a tiny sprout emerge from the soil. Take pictures, share them with your friends, and maybe even give your plants names. Gardening is a journey, not a destination, so savor every moment.
Here are some ways to celebrate:
- Repot your seedlings into cute containers.
- Start planning your garden layout.
- Invite friends over for a "seedling shower."
Wrapping Things Up: Your Indoor Seed Starting Adventure Awaits!
So, there you have it! Starting seeds indoors might seem like a lot at first, but it's really just a few simple steps. You've got this! Think of all the cool plants you can grow, even when it's cold outside. It's super satisfying to watch those tiny seeds turn into strong little plants. And hey, if things don't go perfectly the first time, that's totally fine. Every gardener has those moments. Just keep trying, learn from what happens, and you'll be a pro in no time. Happy planting!
Frequently Asked Questions
My seedlings are leggy! What went wrong?
If your seedlings look tall and skinny, they're probably not getting enough light. Try moving them closer to your grow lights or a brighter window. Making sure they have enough light will help them grow strong and bushy.
What kind of soil should I use?
It's best to use a special seed-starting mix. This mix is usually light and fluffy, often made with things like peat moss, coco coir, vermiculite, and perlite. Don't use regular garden soil or heavy potting soil, as these can be too dense for tiny seeds and might have bad bugs or diseases.
How do I harden off seedlings while working a full-time job?
Getting your plants used to the outdoors, called ‘hardening off,' can be tricky when you work. A good way is to put them outside in a protected spot before you leave for work and bring them back in when you get home. You can also use a special cover that blocks some sun to keep them safe.
How early should I start seeds?
The best time to start seeds depends on what you're growing and where you live. You'll need to know your area's last frost date. Many online tools can help you figure out the exact timing for each plant. It might seem like a lot at first, but it gets easier with practice!
Can I use something other than seed trays?
Absolutely! While special seed trays are handy, you can get creative. Egg cartons, plastic cups with holes poked in the bottom, milk jugs cut in half, or even rolled-up newspaper pots can work. The main thing is to make sure whatever you use has good drainage so your seedlings don't sit in too much water.
What if my seedlings don't grow well or die?
It's okay if your first try isn't perfect! Gardening is all about learning. Many common issues like leggy seedlings (not enough light), damping-off (a disease from too much water or poor air), or slow growth can be fixed. Just keep an eye on your plants, read up on common problems, and don't be afraid to try again. Every gardener has had plants that didn't make it, and that's how we learn to grow better ones next time!