
So, you wanna grow some awesome house plants to start from seed, huh? It's pretty cool to see tiny seeds turn into big, leafy friends right in your living room. It's not just about saving a few bucks; it's also super satisfying to watch them grow from scratch. Plus, you get to pick exactly what you want, whether it's some fresh herbs or those pretty flowers you always wanted. With a little bit of patience and the right stuff, you can totally get your indoor garden going, even when it's chilly outside. Let's get into some quick tips to help you start.
Key Takeaways
- Pick seeds that are good for starting indoors, like tomatoes or peppers.
- Get your growing spot ready with good light and the right temperature.
- Use proper seed-starting mix, not just dirt from your yard, to keep things healthy.
- Water carefully; keep the soil damp but not soaking wet so your seeds don't rot.
- Label your seedlings so you remember what's what as they grow.
Picking the Perfect Seeds for Your Indoor Oasis
Let's get this show on the road! Picking seeds for your indoor garden is like choosing characters for a play – you want the right ones for the roles. It's all about setting yourself up for success, and that starts with understanding what you're buying and what will thrive inside your home. Think of it as curating your own little green world. It's super exciting!
Understanding Seed Packet Secrets
Seed packets are like treasure maps, seriously! They're packed with info that can make or break your seed-starting adventure. Pay close attention to the "days to germination" and "days to maturity" – these numbers will help you plan your planting schedule. You'll also find info on light requirements, watering needs, and even the plant's expected size. Don't skip this step; it's like reading the instructions before building furniture – you'll thank yourself later.
- Germination rate: This tells you the percentage of seeds that are likely to sprout.
- Planting depth: How deep to sow the seeds.
- Sunlight needs: How much light the plant needs to thrive.
Seed packets also often indicate whether a plant is an annual or a perennial. Annuals complete their life cycle in one year, while perennials come back year after year. For indoor growing, annuals are often a better choice since they're easier to manage in containers.
Best House Plants to Start From Seed Indoors
Not all plants are created equal when it comes to indoor seed starting. Some are just easier and more rewarding than others. Think about what you want to get out of your indoor garden – fresh herbs? Pretty flowers? Edible veggies? That'll help narrow down your choices. Here are a few winners:
- Herbs: Basil, mint, and chives are super easy and smell amazing.
- Leafy Greens: Lettuce and spinach are quick growers and provide fresh salads.
- Flowers: Marigolds and zinnias add a pop of color and are relatively low-maintenance.
Starting seeds indoors gives you a head start on the growing season, especially for plants that need a longer time to mature. It's like giving your plants a VIP pass to the garden party!
Finding Quality Seeds for Your Project
Where you get your seeds matters! You want to make sure you're buying from a reputable source that sells fresh, viable seeds. Check out local nurseries, garden centers, or online retailers. Look for seed packets with clear labeling, including germination rates and expiration dates. Organic seeds are a great option if you're aiming for an all-natural garden, but conventional seeds work just fine too.
- Read reviews: See what other gardeners are saying about the seed company.
- Check for certifications: Look for organic or non-GMO labels if that's important to you.
- Buy from local sources: Supporting local businesses is always a plus!
Setting Up Your Awesome Seed Starting Station
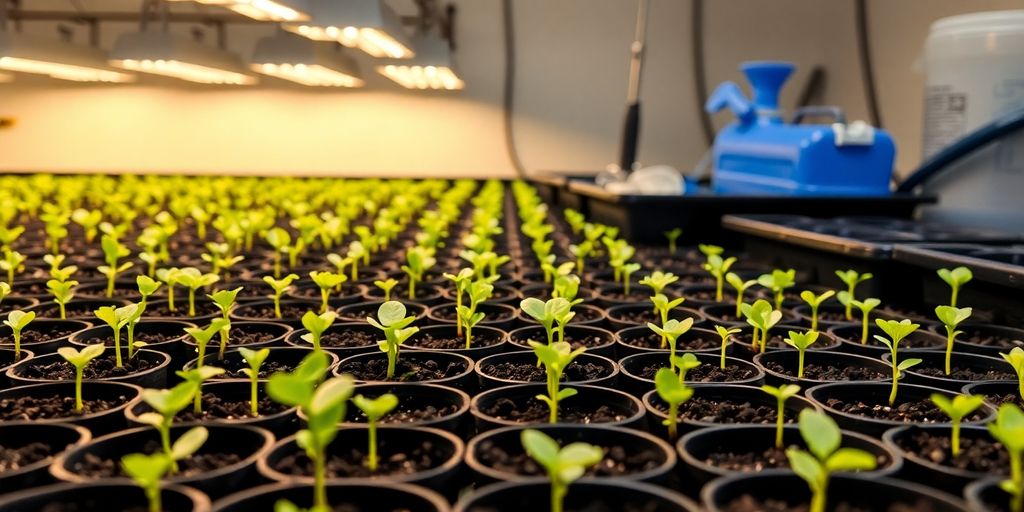
Essential Supplies for Seed Starting Success
Alright, let's get this show on the road! Setting up your seed starting station is like prepping a mini-lab for plant babies. It's actually pretty fun. Having the right stuff makes all the difference, so let's gather our gear:
- Seed Starting Mix: This isn't your regular garden soil. You need a light, fluffy mix that drains well. Think peat moss, vermiculite, and perlite. You can buy it pre-mixed or make your own. I've had good luck with both!
- Containers: Seed trays are great, but don't feel like you need to buy anything fancy. Yogurt cups, plastic containers, even egg cartons can work, as long as they have drainage holes. Drainage is key, people!
- Labels: Don't skip this! Trust me, you'll forget what you planted where. Label everything clearly with the plant name and date.
- Spray Bottle: For gentle watering. You don't want to blast your tiny seeds with a firehose.
- Heat Mat (Optional): These are awesome for speeding up germination, especially for heat-loving plants like peppers and tomatoes. But they aren't essential.
- Grow Lights (Probably Necessary): Unless you have a super sunny windowsill, you'll need grow lights. Seedlings need a lot of light to grow strong and not get leggy. LED grow lights are energy-efficient and work great.
A good seed starting setup doesn't have to be expensive or complicated. The most important thing is to provide your seeds with the right conditions to germinate and grow into healthy seedlings. Don't be afraid to experiment and find what works best for you!
Choosing the Best Seed Starting Mix
Okay, let's talk soil… or rather, seed starting mix. This stuff is important. It's the foundation for your little plant's life. Regular garden soil is too heavy and can contain diseases that will kill your seedlings. You want something light and airy that drains well. Here's what to look for:
- Peat Moss: Helps retain moisture.
- Vermiculite: Improves aeration and drainage.
- Perlite: Adds even more drainage and prevents compaction.
You can buy pre-made seed starting mixes at most garden centers. Or, if you're feeling adventurous, you can make your own. A simple recipe is equal parts peat moss, vermiculite, and perlite. Just make sure to moisten the mix before you plant your seeds. It should be damp, but not soggy.
The Magic of Heat Mats and Grow Lights
Alright, let's talk about some gadgets that can really boost your seed starting game. We're talking heat mats and grow lights! These aren't strictly necessary, but they can make a big difference in your success rate.
- Heat Mats: These provide gentle warmth to the soil, which speeds up germination. Most seeds like a soil temperature of around 70-75°F. A heat mat can help you maintain that temperature, even if your house is a little cooler. Just be sure to monitor the soil moisture, as heat mats can dry out the soil quickly.
- Grow Lights: Seedlings need a lot of light, like 12-16 hours a day. Unless you have a super sunny windowsill, you'll need grow lights. Fluorescent or LED grow lights are great options. Position the lights a few inches above the seedlings and adjust them as the plants grow. This will prevent them from getting leggy and weak.
Giving Your Seedlings the Best Start
Planting Your Seeds Just Right
Okay, so you've got your seeds, your soil, and your containers. Now comes the fun part: actually planting those little guys! But hold on, don't just chuck 'em in there. There's a bit of finesse involved. First, check your seed packet. Seriously, those things are goldmines of info. They'll tell you exactly how deep to plant your seeds. Generally, a good rule of thumb is to plant seeds about two times as deep as they are wide. Make a small hole in your seed-starting mix, gently drop in the seed, and then lightly cover it with soil. Don't pack the soil down too hard; you want those little sprouts to be able to push through easily.
- Use a pencil or chopstick to make the hole.
- Plant a couple of seeds per cell, just in case one doesn't germinate.
- Label everything! Trust me, you'll forget what you planted where.
Remember, every seed you plant is a step towards a greener indoor space. It's like bringing a bit of spring into your home during those cold months. You don't need a ton of fancy equipment to get started, just some seeds, soil, and a little patience.
Watering Wisdom for Happy Seedlings
Watering is crucial, but it's also where a lot of new gardeners go wrong. You want to keep the soil consistently moist, but not soggy. Soggy soil can lead to all sorts of problems, like root rot and damping off (a fungal disease that's basically a death sentence for seedlings). The best way to water is from the bottom. Set your seed trays in a shallow tray of water and let the soil soak it up from the bottom. This encourages the roots to grow downwards, searching for moisture. If you have to water from the top, use a spray bottle and be gentle! You don't want to blast those delicate seedlings with a firehose.
- Check the soil moisture daily.
- Water in the morning so the seedlings have time to dry out during the day.
- Avoid using tap water if it's heavily chlorinated; let it sit out for 24 hours first.
Feeding Your Growing Green Babies
Once your seedlings have sprouted and have a couple of sets of true leaves (those are the leaves that look like the adult plant's leaves, not the initial seed leaves), it's time to start thinking about feeding them. Seed-starting mix doesn't have a ton of nutrients, so your seedlings will eventually need a little boost. Use a liquid fertilizer diluted to half strength. You can find fertilizers specifically formulated for seedlings at most garden centers. Don't over-fertilize! It's better to under-fertilize than over-fertilize. Too much fertilizer can burn the delicate roots of your seedlings. Feed them every couple of weeks, or as needed. Keep an eye on the color of the leaves; if they start to look pale green or yellow, that's a sign they need more nutrients.
- Start fertilizing when the seedlings have their first true leaves.
- Use a balanced liquid fertilizer diluted to half strength.
- Water the seedlings thoroughly after fertilizing to prevent fertilizer burn.
Nurturing Your Young House Plants
Providing Plenty of Light for Strong Growth
Okay, so your seedlings have sprouted – awesome! Now, it's all about making sure they get enough light. Light is basically food for plants, and without enough, they'll get all long and spindly trying to reach for it.
- If you've got a super sunny windowsill, that might work.
- But honestly, for most of us, grow lights are the way to go.
- LEDs are great because they don't use a ton of electricity and they don't get too hot.
Just keep an eye on your little guys and make sure they're not getting burned. You can adjust the height of the lights as they grow. It's all about finding that sweet spot.
Keeping Temperatures Cozy and Consistent
Seedlings are like babies – they like things just right. You don't want them too hot, and you definitely don't want them freezing. Aim for a consistent temperature, somewhere around 70°F (21°C) during the day and maybe a little cooler at night.
- Avoid drafty spots near windows or doors.
- A heat mat can be super helpful, especially if your house tends to be on the chilly side.
- Just make sure you don't cook them!
Thinning for Thriving Plants
Okay, this part can be a little tough, but trust me, it's important. Sometimes you get a bunch of seeds sprouting in the same little pot, and they're all competing for space and nutrients. You gotta thinning out seedlings to give the strongest ones a chance to really shine.
- Pick the seedlings that look the healthiest and strongest.
- Snip the others off at soil level with some small scissors – don't try to pull them out, or you might damage the roots of the ones you're keeping.
- It feels a little sad, but it's for the best! Think of it as tough love for your growing greenery.
Getting Your House Plants Ready for Their New Home
Okay, your little green buddies are growing up fast! It's almost time for them to leave the nest and move into their permanent pots. This is a super exciting step, but it's important to do it right so they can thrive. Let's get them ready for the big move!
The Art of Hardening Off Your Seedlings
Think of hardening off as plant boot camp. It's all about gradually getting your seedlings used to the great outdoors. They've been living the easy life indoors, so they need to toughen up before facing the real world. Here's how:
- Start by placing them outside for just an hour or two in a shady spot. Make sure it's a nice day, not too windy or cold.
- Each day, increase the amount of time they spend outside, and gradually introduce them to more sunlight. Baby steps!
- Keep an eye on them! If they start to look stressed (wilting, scorched leaves), bring them back inside and try again the next day with a shorter time.
Hardening off is super important because it helps your plants adjust to changes in temperature, sunlight, and wind. Skipping this step can shock your seedlings and set them back, or even kill them. So, be patient and take it slow!
When to Transplant Your Growing Greenery
Knowing when to transplant is key. You don't want to move them too early or too late. Here are some signs that your seedlings are ready for their new digs:
- They have several sets of true leaves (not just the first little seed leaves).
- Their roots are starting to fill the seed starting container. You might see them poking out of the drainage holes.
- The weather outside is cooperating! Make sure there's no danger of frost, and the temperatures are consistently warm enough for your plants.
Making the Move to Bigger Pots
Alright, it's moving day! Here's how to transplant your seedlings like a pro:
- Gently remove the seedling from its current container. Be careful not to damage the roots. If it's stuck, try squeezing the sides of the container to loosen it.
- Prepare the new pot with fresh potting mix. Make a hole in the center that's big enough to accommodate the seedling's root ball.
- Place the seedling in the hole and gently fill in around it with more potting mix. Don't pack it down too tightly. Water them well after transplanting. This helps settle the soil and reduces transplant shock. Consider using a soluble fertilizer at half strength to give them a boost.
Common Questions and Quick Fixes
Troubleshooting Leggy Seedlings
Okay, so you've got leggy seedlings? Don't panic! It happens. Leggy seedlings are basically plants that are stretching too much to reach for light. The main culprit is usually insufficient light. Here's what you can do:
- More Light: Move them closer to your grow lights or a sunnier window. If using grow lights, make sure they're only a few inches above the plants.
- Support: Gently prop them up with small sticks or toothpicks. This will help them stay upright until they get stronger.
- Repot: You can bury the stems deeper when you transplant them. The buried part of the stem will grow roots, making the plant stronger.
Leggy seedlings are a sign that your plants need more light. Adjusting their environment early on can save them and get them back on track.
Dealing with Pesky Pests and Diseases
Ugh, pests and diseases. Nobody wants them, but they happen. Keep a close eye on your seedlings for any signs of trouble. Early detection is key! Some common issues include:
- Aphids: Tiny green or black bugs that suck plant juices. Blast them off with a strong stream of water or use insecticidal soap.
- Fungus Gnats: Small flies that hang around the soil. Let the soil dry out a bit between waterings and use sticky traps.
- Damping Off: A fungal disease that causes seedlings to rot at the base. Make sure your seed starting mix is well-draining and avoid overwatering.
Avoiding Common Seed Starting Blunders
Even experienced gardeners make mistakes! The important thing is to learn from them. Here are a few common blunders to avoid:
- Overwatering: This is a big one! Soggy soil can lead to root rot and other problems. Let the soil dry out slightly between waterings.
- Starting Too Early: It's tempting to get a head start, but if you start too early, your seedlings might outgrow their space before it's time to transplant them outdoors.
- Using the Wrong Soil: Don't use garden soil for starting seeds! It's too heavy and can contain pests and diseases. Use a seed-starting mix instead.
Enjoying Your Homegrown House Plants
Okay, so you've nurtured your little seedlings, transplanted them, and watched them grow. Now comes the best part: actually enjoying the fruits (or leaves, or flowers!) of your labor. It's time to sit back, relax, and bask in the green glory you've created. Seriously, there's something super satisfying about having plants you started from tiny seeds thriving in your home.
The Joy of Growing Your Own
There's a special kind of satisfaction that comes from growing your own plants. It's like you've created a little piece of nature right inside your home. It's not just about having pretty greenery; it's about the process, the connection to nature, and the sense of accomplishment. Plus, you get to brag to all your friends about your amazing green thumb!
- It's a great stress reliever. Tending to plants can be super therapeutic.
- You get to enjoy fresh herbs or veggies, depending on what you've grown.
- It adds a personal touch to your home decor.
Watching a tiny seed sprout and grow into a thriving plant is seriously magical. It's a reminder of the power of nature and the simple joys in life. Plus, it's way cooler than just buying a plant from the store.
Continuing Care for Mature Plants
Just because your plants are grown up doesn't mean the work is over! Mature house plants still need love and attention to stay healthy and happy. Think of it like this: they're like pets, but with less barking and more photosynthesis. Regular care is key to keeping them thriving for years to come.
- Regular watering is a must, but don't overdo it! Check the soil moisture before watering.
- Fertilize during the growing season to give them a boost.
- Repot them every year or two as they outgrow their containers.
Sharing Your Green Thumb Success
Okay, so you've got a house full of thriving plants. What's next? Share the love! Propagating your plants and giving them away to friends and family is a great way to spread the joy of gardening. Plus, it's a super thoughtful and unique gift. Who wouldn't want a little piece of your green oasis?
- Take cuttings and root them in water or soil.
- Divide plants that have multiple stems or crowns.
- Share seeds from your plants with other gardening enthusiasts.
Wrapping Things Up: Your Green Journey Starts Now!
So, there you have it! Starting plants from seeds indoors is a pretty cool way to get your garden going, no matter the weather outside. It might seem like a lot at first, with all the talk about soil mixes and grow lights, but honestly, it's simpler than you think. Just remember to pick the right seeds, give them a good home, and be patient. You'll be amazed at how a tiny seed can turn into a thriving plant right there in your living room. It's a fun project, and before you know it, you'll have a bunch of happy plants ready for your garden. Happy growing!
Frequently Asked Questions
Why should I start house plants from seeds indoors?
Starting seeds indoors lets you get a head start on the growing season, especially for plants that take a long time to grow, like tomatoes and peppers. It also gives you more choices of plants than you might find at a store.
How do I pick the best seeds for my indoor plants?
Look for seeds that are good for indoor growing, like tomatoes, peppers, and many herbs. Check the seed packet for details on how deep to plant them and how long they take to sprout. Make sure to buy from trusted stores or online sellers to get good quality seeds.
What basic things do I need to start seeds indoors?
You'll need seed starter trays, a special seed starting soil mix (not regular garden dirt), and labels to remember what you planted. Grow lights and a heat mat can also be very helpful to give your seedlings a strong start.
How often should I water and feed my young plants?
Water your seedlings gently, often with a spray bottle, to keep the soil moist but not soaking wet. Too much water can cause problems. As they grow, you might need to give them a little plant food, but be careful not to give them too much.
What's the best way to care for my seedlings as they grow?
Make sure your seedlings get plenty of light, either from a sunny window or grow lights. Keep the room at a steady, comfortable temperature. When your plants get bigger, you'll need to thin them out, which means removing the weaker ones so the stronger plants have enough space to grow well.
What does ‘hardening off' mean, and why is it important?
Before moving your plants outside, you need to ‘harden them off.' This means slowly getting them used to outdoor conditions by putting them outside for short periods each day, gradually increasing the time. This helps them get strong enough for their new home.